Building the Penny Flipping game using Clojure, ClojureScript and PubNub
Author’s note: A portion of this post was also published on PubNub’s blog
If you have ever attending a lean or agile process training, then you may have encountered a coin flipping game. It goes by several names, including the lean penny game or “pass the penny”, but they all share a similar set of rules and game play. In short, the idea is to demonstrate lean manufacturing concepts and how they relate to project management and software development.
It’s a timed exercise, where teams are challenged to pass a set of coins through the team, in set batch sizes, as quickly as possible, flipping the coins as they go. The outcome is that the smaller batch size you use, the faster you complete the game. For example, passing two coins at a time is much faster than passing 20 coins at once. Not only do you get the first coins to your customer faster, but you also complete passing all the coins faster.
We built an online version of this game, which allows distributed teams to play the penny flipping game. The following video demonstrates the game and the concepts behind it, and then the rest of this blog post shows in detail how we built it using real-time data platform PubNub and Clojure.
Remotely Flipped – an online version of the lean/agile coin flipping game from arinsime on Vimeo.
Our team of designers and developers at AgilityFeat are experts in PubNub and other real time frameworks, so if you would like us to build a real time application for you, just let us know! This particular exercise took just a few days of work, but of course most of our real time applications are much more complex. Real time applications include communication applications, data dashboards, IoT apps, and even games like this simulation. Just contact us!
Now, let’s get to the detailed techie explanation of how we did it. The rest of this blog post was written by one of our excellent developers, Germán Goldenstein, who also wrote all the code for this application.
Here are the key URLs you need for our implementation and the code base:
– Demo deployed in Heroku: http://remotelyflipped.com
– Code: https://github.com/agilityfeat/penny-pub-react/tree/game
About PubNub
PubNub is a commercial real time platform for publish/subscribe messaging. That basically means that we setup a channel on their service which any copy of our software subscribes to. That channel works like a chat room. Any data that one of the users publishes to the channel is sent out to all the other subscribers to that channel.
This is a relatively simple concept that has huge implications. In our application, we use it to keep the data in synch across anyone looking at the coin flipping game in action. Whenever a user passes their coins to the next player, that action needs to update all of their browsers in real-time in order to keep the game flowing smoothly. PubNub makes it easy for us to do that.
PubNub is not the only provider of a service like this, and there are also open source publish/subscribe servers you can setup yourself and use for free. However, we like using a commercial service like PubNub because they take care of all performance, scaling, and devops concerns so that we don’t have to. All we have to do is write javascript to interface to their API’s.
Reviewing the flow of the ‘Penny Flipping’ game
1) A moderator comes to the web pages and starts a new “room” which will represent a team. This produces a unique URL for that team.
2) The moderator gives that URL to everyone who should be on the team (this is done by email or chat outside of the tool). Exactly 4 people are necessary to play the game.
3) Anyone with the URL is prompted to enter their name when they arrive on the page, and they are assigned an order in the team based on their arrival.
4) The web page shows images of virtual pennies, and a box for each person on the team with their name in it. All the virtual pennies are in the box of the first person.
5) The moderator enters the number of coins for the batch size in this round, starts the game, and a timer also starts.
6) The first person on the team can start “flipping” coins by clicking on them and moving them to a special area in the box. When they have the right number of coins in the batch area, they can press a button to “pass the coins”. That person can then immediately start flipping more coins to put in the next batch.
7) The next person has now been given the first batch of coins from person #1, and they can immediately start flipping them and moving them to the queuing area in their box. As they fill the box with the right batch size, they too can pass the coins to the next person.
8) For the last person, they do not pass the coins, they click a button to “complete” that batch.
9) Two times are recorded for the team. The time it took until the last person completed the first batch of coins, and the time it took until all the batches were complete.
10) At the end, these times are displayed on the screen, and the round is over.
11) The moderator will probably write these down somewhere (outside of our tool)
12) The moderator can then start a new round with the same team with a different batch size. None of the statistics from the last round are saved.
OK, Let’s get started!
Prerequisites
In order to compile and run a Clojure project you need to have Leiningen installed. If you never had the opportunity to build an application in Clojure, we recommend you to read our post “How to build a Walking Skeleton” where we explain how to setup a Clojure environment using Leiningen.
Step 1: Create a basic app with Luminus Framework
We used Luminus Framework, a great Framework to build apps quickly in Clojure and ClojureScript.
Doing this is very simple: just open a terminal and type the following line:
This will create for us the basic structure of the application, where the Clojure and ClojureScript code are separated into two different directories. Clojure code will be under /src, while Clojurescript code will be in /src-cljs. Luminus comes with Bootstrap, with the default design. We make the mockups for this project, also based on Bootstrap. You can download the mockups here.
We will focus on /src-cljs, since most of the game will be developed in ClojureScript.
Under /src-cljs we have the file core.cljs that we’re going to use as the Presentation Layer, writing here the code of the different views and other general functions.
We will create a second file called pubnub.cljs where We will write all the functions We need to interact with the PubNub JavaScript API.
Step 2: Include the PubNub JavaScript Library inside the HTML template file.
When you create a Luminus Project, It comes with a home.html file. The location of that file is /resources/templates/home.html.
We’re going to reuse this file, and include the PubNub JavaScript Library as follows:
You can include the minified version for production, and the developer version for your local dev environment.
Also, inside the “body” tag you have to leave the header with id “top”, and a div with id “app”.
Reagent will use both to make a render of the navbar and the center body of the page.
In core.cljs you will find a function that handles the connection between these two HTML components with Reagent.
The div with the id “app” show the result of the function page. This function returns the value of pages which is defined as a map containing keys-values pairs relating to each component.
For example, the key :home has the value [home-page], which is the component that shows the home.
So, to show the component [home-page] in div “app” , we just change the session as follows:
Step 3: New team creation process
3.1) Homepage
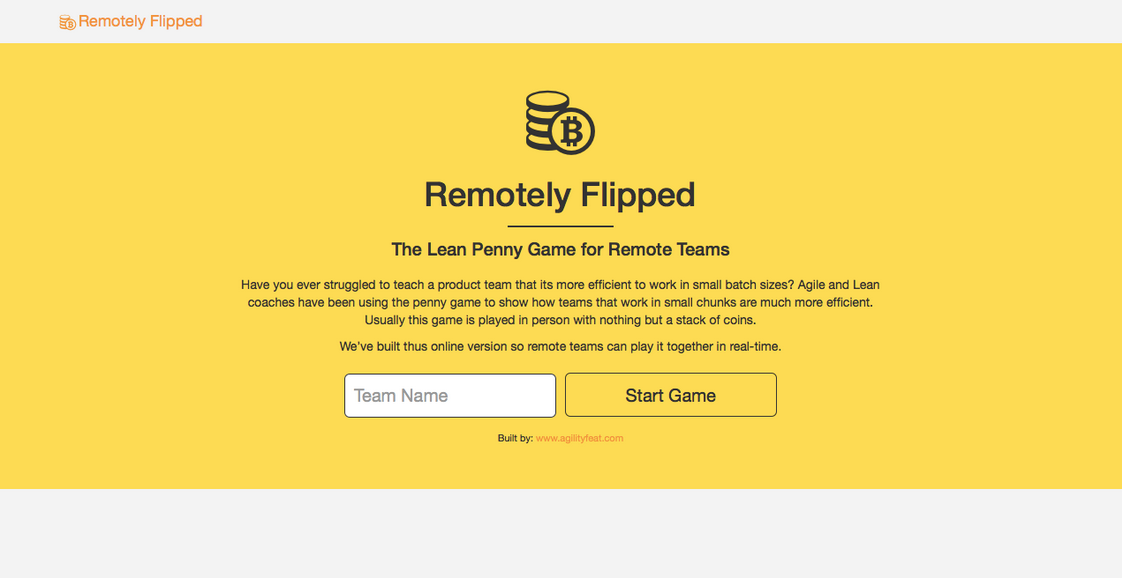
As you can see in the screenshot above, the homepage is very simple. To create the team, the moderator enters the ‘Team name’ into the input text. When he press the ‘Start button’, the event OnClick should do the following:
1) Make a new connection to PubNub
2) Make a Subscription to the new channel using the Team name as the Channel name.
3) Generate a new URL and show It on screen in order to the moderator can send It to the four players.
Let’s see the code of the Home page. (You can see this on github in the file core.cljs):
This is how Reagent works. Just need to write the HTML code using Hiccup syntax, and Reagent will convert it to real HTML code.
The team name will be stored in an atom called ‘team-name’ defined in core.cljs as follows:
This are the step that happens when the onClick event of the button ‘Start Game’ is fired:
1) Generate a friendly URL (slug) using the name of the team:
And here is the slug function:
Once the slug is generated, is stored into the atom “team-slug”
2) Use an atom in order to know that we are a moderator user.
This will serve to show us some options and screens that are only for the moderator
3) Connect to PubNub using the JavaScript API
Now, we start to define the functions in order to use the PubNub API, that will be created in the file pubnub.cljs
Here is the code to create the pubnub/connect function:
In order to call the connect function from core.cljs we must include the namespace of pubnub.cljs into core.cljs, as follows:
4) Create PubNub channel and subscribe to moderator on it
This function is very important. Not only will take care of creating the channel and subscribe the moderator but also administer the values of some Atoms that will serve us for the game, such as timers and the player data.
This is the subscribe-moderator function definition:
You can see the complete description of how to use the PubNub subscribe function here.
The important thing to understand is that all PubNub functions have some callbacks:
- presence: When a user joins in a channel, the callback “presence” is executed. That’s where we need to update the information the new player in the atom players.
- message: When a player send any message using the PubNub function publish the callback “message” is executed.
- state: gives us the ability to add information to the newly connected user, such as a username, for example. In our case, besides a username dispatched two values more : “state_game” which is the state is the game (Waiting for players or Playing), and “channel_name ” with the name of the channel. When a new player joins the channel, he consult these values and be able to read the channel name.
3.2) Show the Team‘s URL on screen
As we saw above, when we change the value of :page in the session, another screen will be displayed. In this case :step2. So now we see the [step2-page] component.
This page looks now like this:
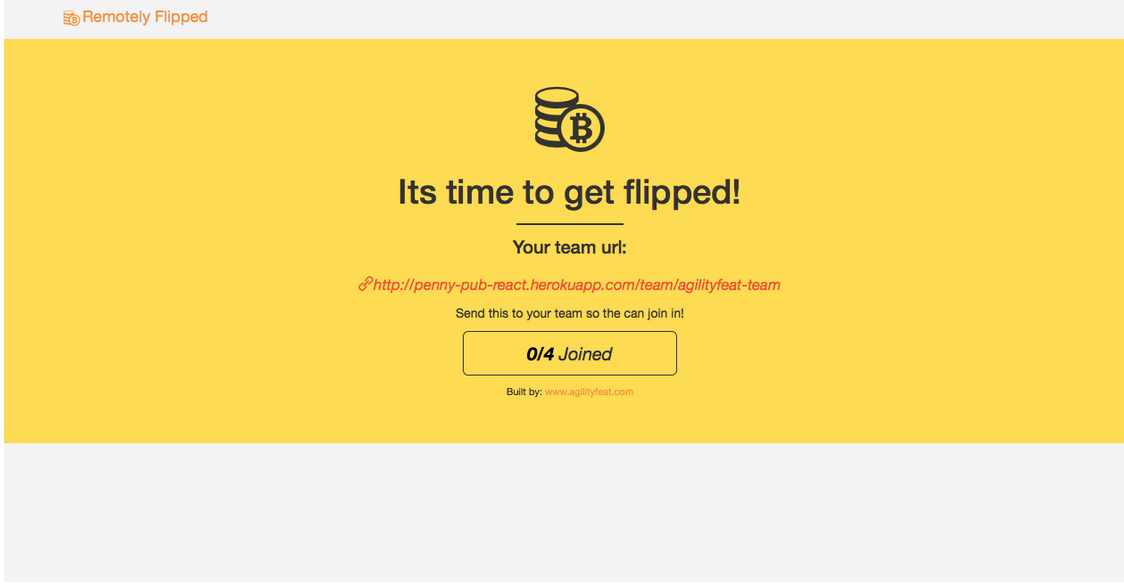
On the screenshot, the name of the Team is “AgilityFeat Team”, and the generated URL is:
http://penny-pub-react.herokuapp.com/team/agilityfeat-team
The code for the component [step2-page] is the following:
Until all the four players are ready, the screen looks like the screenshot above.
Only when the four players are ready to play, the component [step4-page] will display.
In order to detect when a player is ready, we define the function p-ready? as follows:
p-ready? expects the player index (from 0 to 3) as parameter, and reads the state of the player inside the atom players. Returns true if the state is equal to “ready”
Finally, we have two components showing the number of the players that are connected in the channel, and the list of them:
The function get-total-players counts the number of players that are “ready”, and completes the text “X/4 Joined”, where X is the quantity of “ready” players.
The function get-list-players shows a list of players with their username.
Step 4: Players join the channel through the team URL
Each one of the Players will open a browser with the Team URL.
In order to detect that a Player want to Join a team, we must detect the URL pattern and extract the slug.
For example, if the team URL is http://penny-pub-react.herokuapp.com/team/agilityfeat-team then we have to extract the slug part, which in this example is ‘agilityfeat-team’
To do this, we have to edit /src/penny_pub_react/routes/home.clj where is all the routing configuration, using Compojure.
Let’s see the code of this file:
So we have to add a new route for the team URL. Now the code looks as follows:
All the urls with the pattern “/team/:team-slug” will call the function team-home-page sending the slug part as a parameter. The function team-home-page use the same template than the home page.
In order to detect this patterns and send the Player to the correct screen, we have to add the function:
The function set-page analyzes the value of window.location.href and verifies if the string ‘/team/’ matches using the indexOf.
If it matches then proceed to:
1) connect the player to the channel
2) make the subscription (like we do before with the moderator)
3) Show the home page of team
Let’s see the pubnub/subscribe-user function:
This function is very similar to the subscribe-moderator, but it has many differences:
1) we add in this function the “connect” callback. This callback will be launched when the player is connected to the channel. When that happens, the atom connected? will be true.
2) When the user joins the channel the “presence” callback is fired. Here the player sets his player number using the property “occupancy” of the object m returned by “presence”, which has information of the channel.
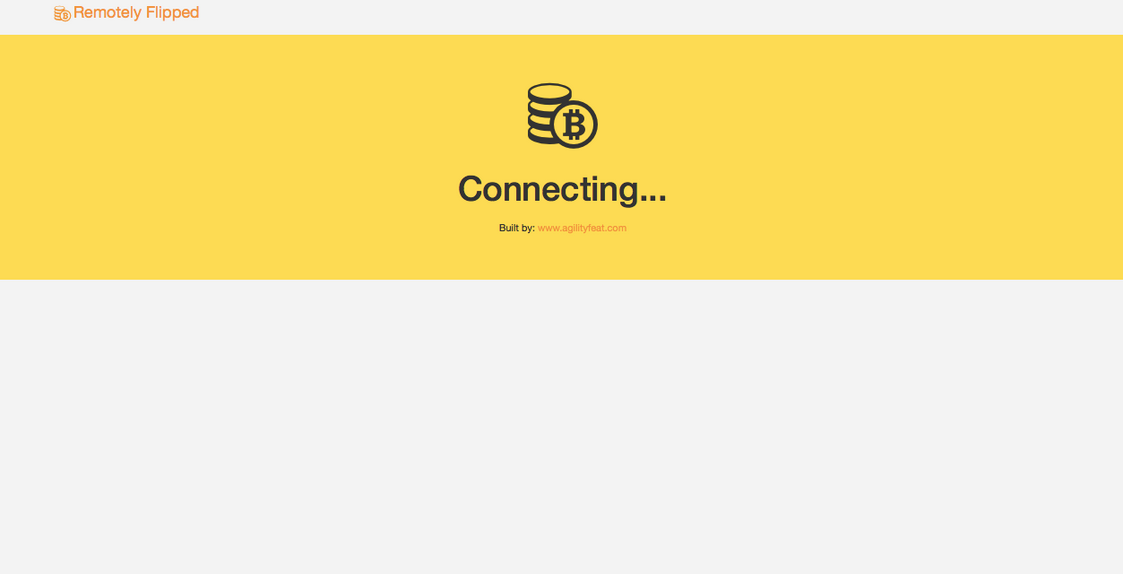
Let’s see the code of the Team home page:
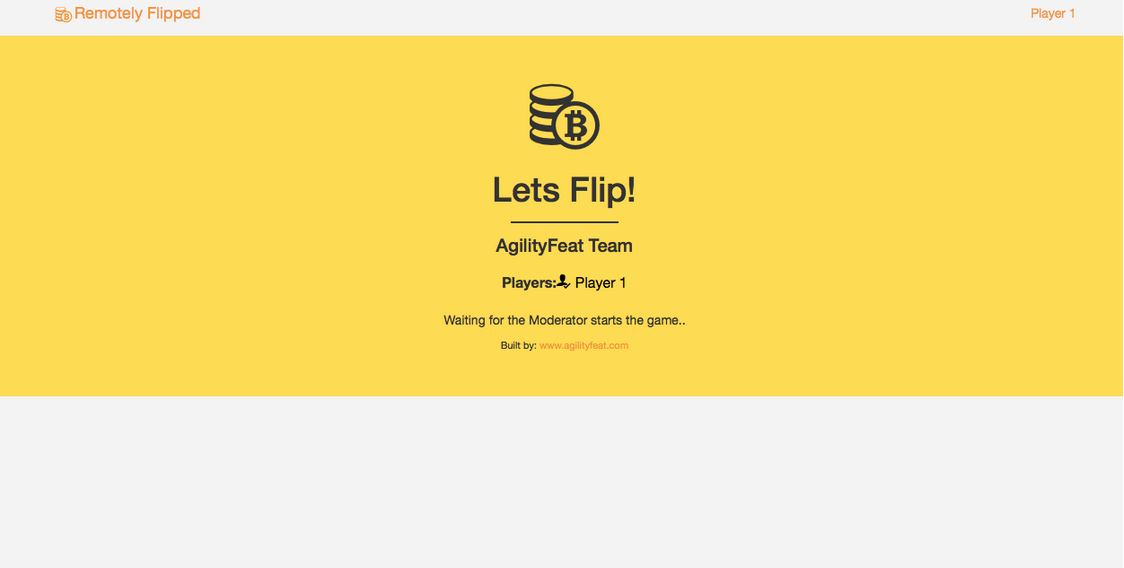
The component [team-page] will check if the player is connected and has a player number. Until the user is connected and has assigned a number of player, the player will see the component [connecting-page]:
Once the user is connected, he will see the next page. At this point, the player does not enter his name yet, so the component [step3-page] will be displayed as follows:
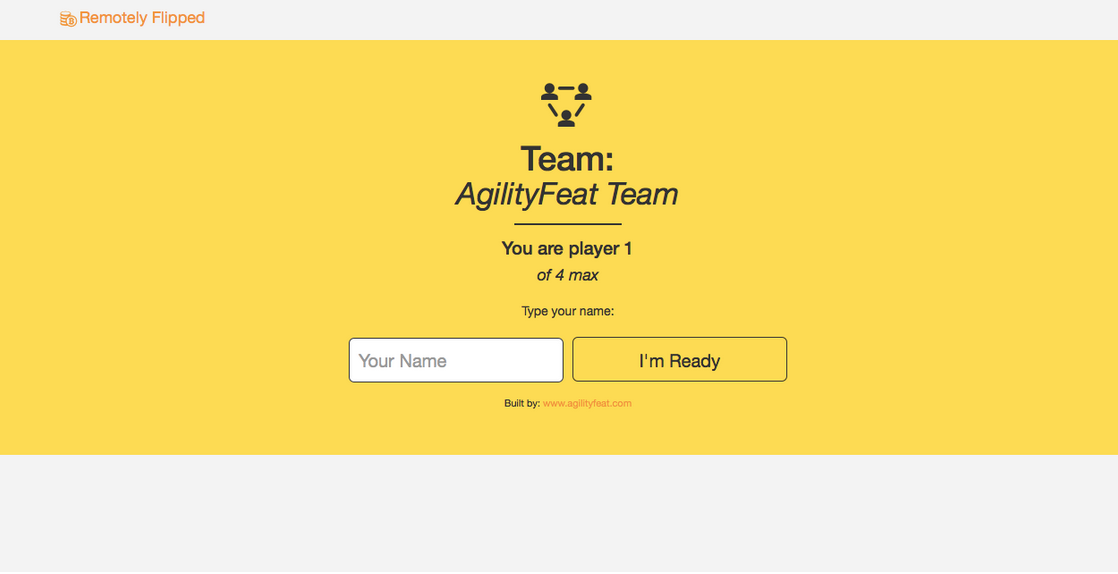
Here is the code of the component [step3-page]:
The username is stored in the atom user-name. When the player press the button ‘I’m Ready’, the onClick event call the function pubnub/set-state which will update the information of the player.
Let’s see the set-state function:
This function receives the JavaScript object with the user information, and send it to PubNub with the state function.
So now we have a player name, and as we saw above, now the player is going to see the [step4-page], as follows:
Now, let’s see the code for the component [step4-page]:
The first thing that this functions do is check the value of the atom playing?
This atom stores a bool value that indicates if we are playing or not.
If playing? is false, then the screenshot above will show up. Else, the component [step5-page] will be displayed.
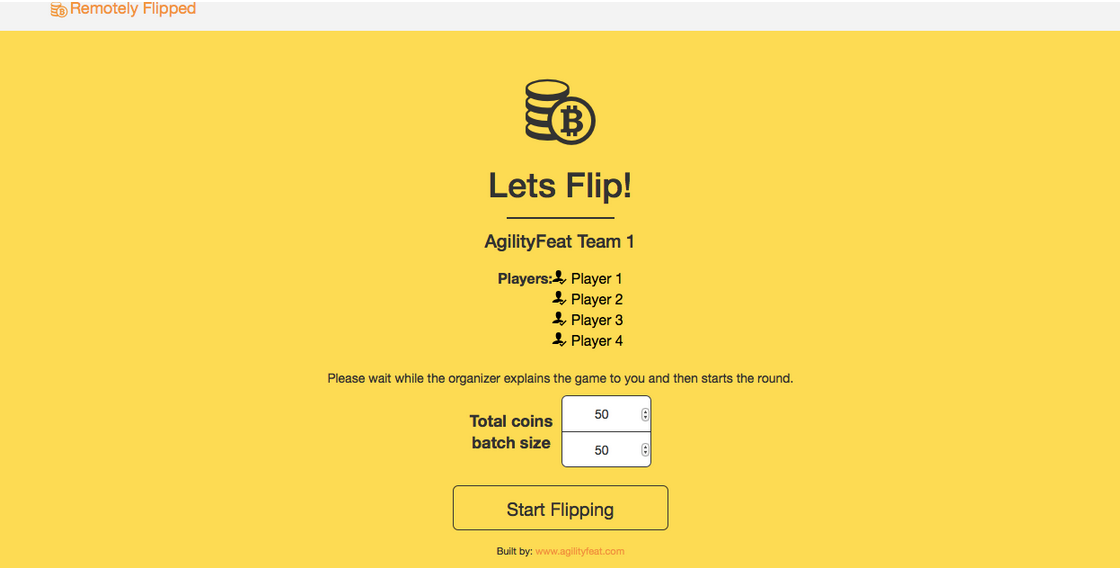
If the logged in user is the moderator, the atom moderator? will be true, and shows two input text to fill the total coins and batch size. Else, if the logged user is a player, only sees the message “Waiting for the Moderator starts the game..”.
Step 5: The Moderator set the values of total coins and batch size , and starts the round.
When the four players are ready, the moderator sees the component [step4-page]. Now, he is able to enter the values of total coins and the batch size, and then start the game.
Let’s see how this screen looks:
At this time, players are waiting for the moderator start the game, and this is the screen they see:
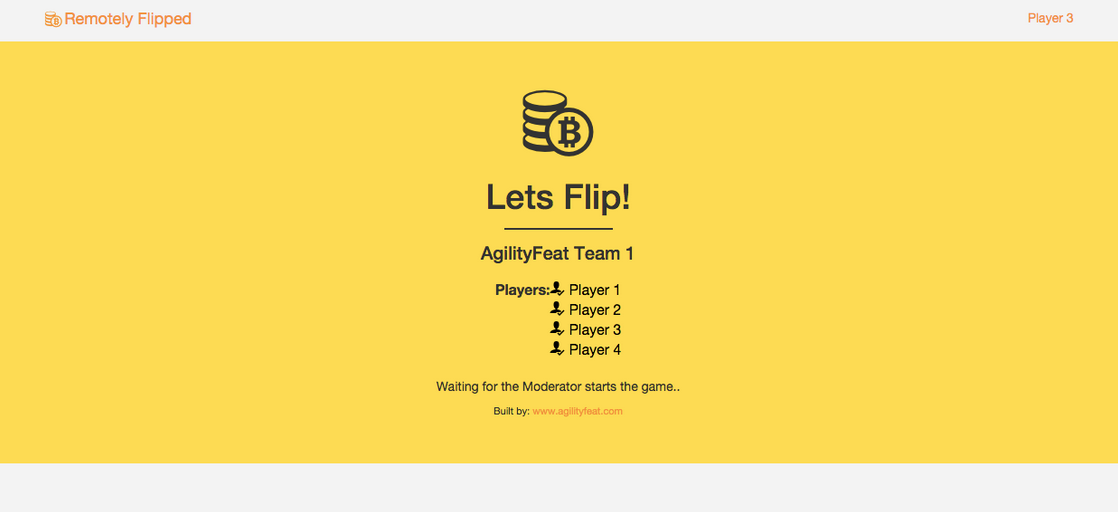
Both screen are the same component: [step4-page]
When the moderator completes the values and press the button ‘Start Flipping’ , the function start-game will be executed. This function starts the game, and send a message to all the players through PubNub notifying that the game begins.
Each player will receive this message through the “message” callback of the function subscribe-user, as we saw before, and then change the value of playing? to true. And Finally the component [step5-page] will be displayed.
Let’s see the code of the function start-game
After a simple verification of the values of total icons and batch size, the function pubnub/set-state stores this new values in the moderator information.
Then, restarts the timers to zero, and send the message to all the players through the function pubnub/send-message
Finally, the atoms playing? change to true, and finished? to false.
What we need now is to define the function pubnub/send-message as follows:
This short function use the PubNub publish function to send a message. With this function we could send any message we need in the format of any valid JSON type including objects, arrays, strings, and numbers.
Step 6: The game core
When the game starts, the moderator sees the component [step5-game] as follows:

As you can see, the moderator is not able to move any penny. He can only views what is happening.
However, the players screen looks a little different. They can move their coins to the next player, as follows:
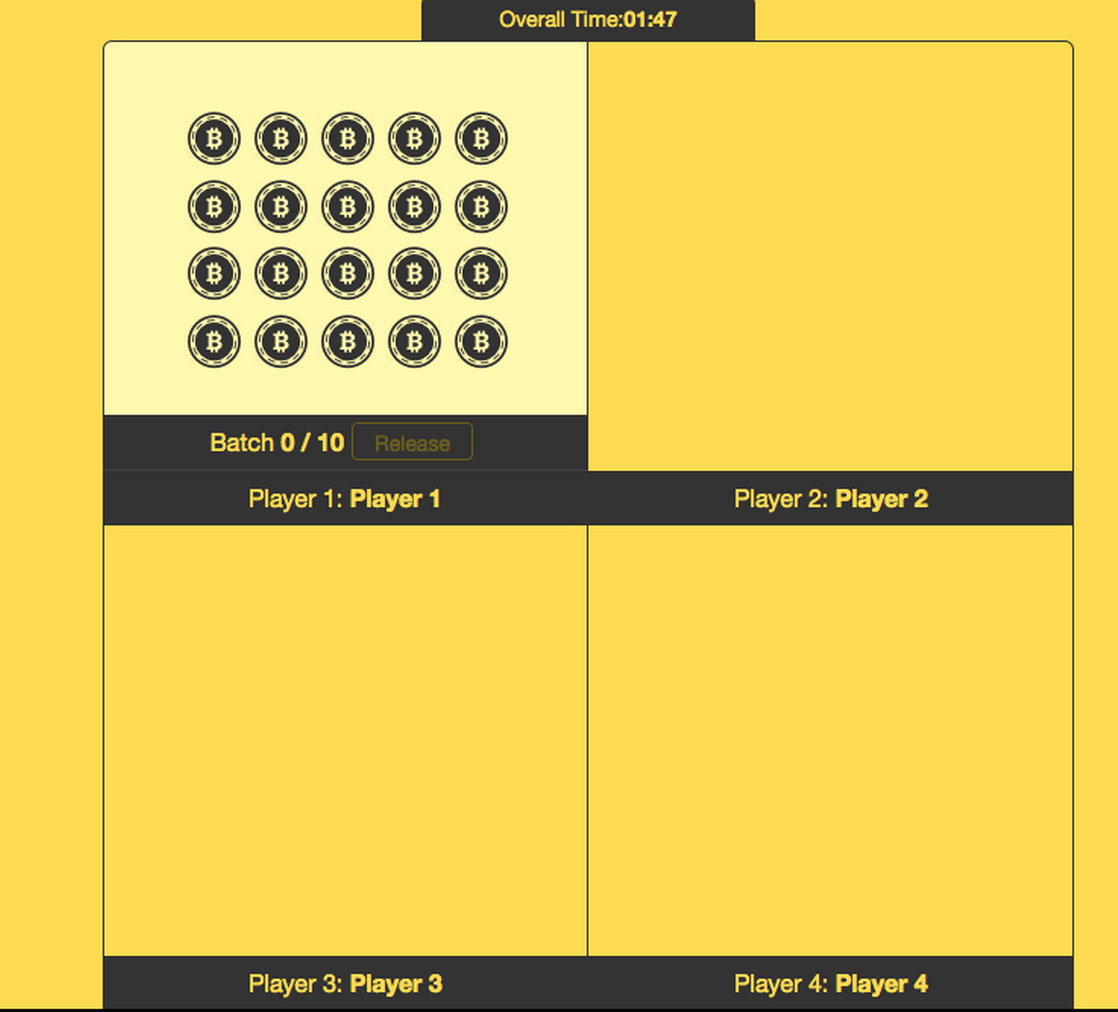
When the player selects the same amount of coins than the batch size, the “Release ” button will be enabled, and the player is going to be able to send the batch to the next player.
Let’s see the code of the component [step5-page] which is the core of the game:
Until the atom finished? is set to false, we are still playing, so the component [game] will be displayed.
If finished? is set to true, then the component [show-results] will show up.
This is how the code of the component [game] looks:
This component looks very simple. Shows the timers, and use another component to show each one of the players area: [draw-coin-panel]
This function receives the index of the player (from 0 to 3) and then prints the coins of that player.
Let’s see the code of [draw-coin-panel]:
This component is divided in two divs: div.coin-table and div.footer.
The div.coin-table contains the Player’s coins. As you can see, with a for loop statement from 0 to (get-in @players [player-index :coins]) (which is the number of coins that the player has) we draw each one of the pennies.
When the player clicks one of the coins, the coin will “flip”, and the atom qty-to-send will increase +1. If the penny was flipped before, then qty-to-send will decrease -1.
The div.footer shows only for the logged player. That’s why the moderator don’t see It, and neither the rest of the players. Each player sees his own div.footer
When It shows, the player can see the number of selected coins, and the release button.
The release button will be enabled only when the player select the same amount of coins than the batch size.
When the player press this button, two things will happen:
1) The release function will be executed
2) The counter qty-to-send will be restarted to zero.
The release function receives two parameters: the player number, and the quantity of coins to send.
Let’s define this function as follows:
Very simple right? The only thing this function has to do is send a message to all the players with the key “state_game” and the value “update_coins”, and the callback “message” of the subscribe function will do the rest.
Step 7: Round complete! show the round times and start the new round
Finally, when the fourth player releases all his coins, the round is completed. The value of the atom finished? now is true and the component [show-results] will be displayed.
All the players and moderator will see a new screen with the Overall time and the First Batch time.
This screen looks as follows:
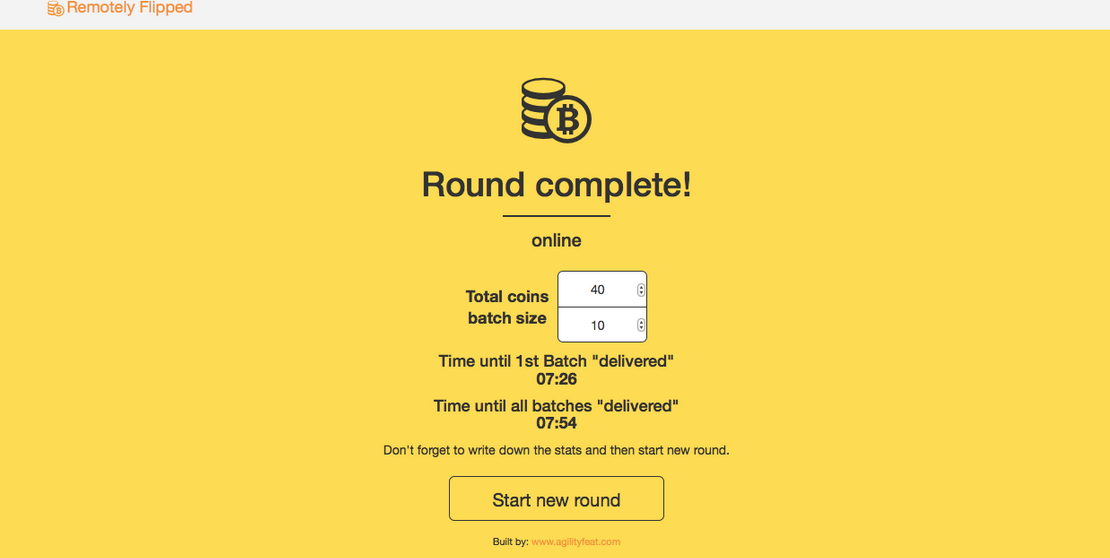
Notice that only the moderator sees the button “Start new round”.
Let’s see the code of this page:
If the value of the atom moderator? is true, then the first part of this component will be displayed. When the moderator press the button “Start new round”, the function start-game will be executed, and all the game starts again, with all the atoms restarted.
Conclusions
This little game was built with a specific goal in mind – demonstrating to remote teams that small batch sizes are better than large batches. The concept applies to many industries, but in software development it shows that releasing your software in lots of small deployments is more effective than large big bang deployments.
If you would like to play the game, check it out at:
From a technical perspective, we hope that you have seen how we combined Clojure and PubNub to build this app and keep the data in synch across browsers. But the technical concepts are applicable well beyond a simple coin flipping game, or games in general. You can use these same concepts to build real time data dashboards, Internet of Things applications, communication applications, and more.
Our team of designers and developers at AgilityFeat are experts in PubNub and other real time frameworks, so if you would like us to build a real time application for you, or if you have questions, just let us know! We’re happy to help!